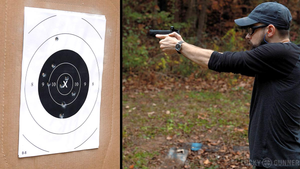
We can consider the 25 yards one of the most important missions on a shooter’s journey. It’s a real milestone—a good grouping at this distance means you’ve mastered the basics and stepped into the realm of accuracy and precision shooting.
And yet, you’d be surprised how many shooters—even the ones who’ve been at it for a while—struggle to land clean hits at 25 yards.
If you don’t practice right and often enough, it’s easy to roll back.
So why is shooting consistent, tight groups at 25 yards such a big deal? Because it means you’ve nailed the fundamentals. Grip. Stance. Sight alignment. Trigger control. No tricks, no gear magic—just pure skill.
Plus, 25 yards is a standard distance in USPSA, IDPA, bullseye, and steel challenge stages. It’s where real accuracy counts.
If you’re chasing this milestone—or getting back into shape for it—you’ve hit the target. In this guide, we’ll break down how to shoot a handgun at 25 yards. From grip and stance to drills that take you from 7 yards all the way to 25-yard precision.
Let’s gear up and get started.
Master the Basics
Shooting Stances
We all want to look cool when we’re standing at the line, pistol in hand, ready to shoot. But looking sharp doesn’t mean much if your stance can’t back it up, right?
A solid shooting stance is about stability, control, and repeatability. It’s your foundation—and without it, everything else falls apart.
So, back to the two basic stances to master 25-yard shooting:
The Isosceles Stance
The Isosceles stance is the most common, and the first one we recommend you master. You stand square to your target, feet shoulder-width apart, arms fully extended. Your weight should be slightly forward. Simple and natural—that’s it.
This stance gives you a balanced platform and makes recoil easier to manage. Exactly what you’ll need to lock in 25-yard shooting.
The Weaver Stance
The Weaver stance has a bit more angle to it. Your body is bladed slightly, support-side foot forward, shooting arm straight, and support arm bent.
Since the Weaver brings your body into the recoil a bit more, it creates tension between your arms that helps control movement. It’s a good second step toward your 25-yard goal.
Solid Master Grip
A proper grip for handgun shooting does two key things: it helps you align the muzzle with what you’re aiming at, and it gives you control to manage recoil and get back on target fast.
Here’s how to get that solid, two-handed grip dialed in:
Start by grabbing the backstrap from the top—right between your thumb and index finger, just under the beavertail. Your index finger stays straight, resting outside the trigger guard. The other three fingers wrap around the grip, stacked tightly under the trigger guard.
You should feel firm pressure between your middle finger and the base of your thumb. First step, locked in. Next, your non-dominant hand.
You’ll see a gap on the grip—between your palm and the exposed side of the grip. Press the base of your support hand right into that gap, then wrap your fingers around the three fingers of your dominant hand. The index finger of your support hand should sit just under the trigger guard.
That’s it. Now practice this and you’ll achieve proper grip for handgun shooting at 25 yards.
Focus on Aiming and Trigger Control
Sight Alignment & Sight Picture
Your sights are your guide. If they’re not lined up right, even the best grip and stance won’t save your shot.
Proper sight alignment means the top of your front sight is level with the top of your rear sight, with equal light—or space—on each side of the front sight.
If that front sight isn’t centered or level, your shot’s going to drift. Left, right, high, or low—it’ll show up downrange.
Now let’s talk about sight picture. That’s when you take your perfectly aligned sights and bring the target into the background. Here’s the catch: your eyes can only focus on one thing at a time. So where should your focus be?
Answer: the front sight. Keep that sharp and clear. Let the rear sight and the target blur just slightly. That’s the key to clean, consistent shooting.
If your groups are wide and off to the sides, it’s probably your trigger squeeze. Jerking the trigger can throw the shot left or right. If your shots are going up or down, it’s likely your breathing.
But if they’re spraying side to side—yep, that’s trigger control, and that's what we are addressing next.
Trigger Control
Trigger control is where good shots are made—or missed. If you want tight groups at 25 yards, this is where you lock it in.
How to master trigger control?
First, check your trigger finger placement. You want to press the trigger straight back—directly on the face of it. Not from the sides, not at an angle. If you pull sideways, you’re moving the whole gun, and your shots will tell the story.
Next, focus on the reset. After each shot, let the trigger move forward just enough to reset—then get right back to the prep point. That’s the spot where the wall begins. Don’t ride the trigger slow, and don’t pin it to the rear.
A fast, controlled reset helps your speed and rhythm—especially when shooting multiple rounds.
Finally: grip, then pull. Your support hand should already be locked in before the trigger breaks. Don’t tighten your grip as you’re pressing the trigger, that will move your aim out of target. Stay steady, stay firm, then pull.
Trigger control takes reps. But once it clicks, your accuracy at 25 yards jumps up fast.
Practice Makes Perfect

If you’ve read our Top 10 Pistol Shooting Drills post, you already know the value of dry fire. Simple drills like the Wall Drill or the classic Penny Drill can do wonders for your trigger control and sight alignment.
But when it’s time to go live, you need structure. So here we’ll go over three simple live fire drills to help you progress from 10 to 25 yards. These are great for tracking your improvement and tightening your groups.
Here’s what to aim for:
-
10 yards: Tight 5-shot groups—try to keep them under 2 inches.
-
15 yards: Stretch it out. Goal here is 3" to 4" groups.
-
25 yards: This is your benchmark. A solid shooter should stay within 4" to 6" at this range.
Slow Fire Accuracy Drill
This is where it all starts. The goal here is simple: slow down and focus on doing everything right—stance, grip, sight alignment, trigger control.
Set your target. Fire five rounds, one at a time. Wait 5 to 8 seconds between shots to assess how you did. No rush. Take your time to build each shot from the ground up.
Watch your front sight. Feel your grip. Control your trigger press.
Don’t worry if you’re not getting tight groups yet. As you progress from 10 yards to 25 yards, you’ll get better. Just track your group size and keep working on tightening it up.
Controlled Pairs Drill
Once you’re landing solid hits with slow fire, it’s time to pick up the pace—just a little. The Controlled Pairs Drill helps you work on recoil management, follow-up shots, and maintaining accuracy under pressure.
Set your target. From a proper stance and grip, fire two rounds in quick succession. Not a double tap—there should be a clear pause between the first and second shot.
This pause gives you time to reset your sights and confirm your grip before the next shot. You’re building control, not rushing through it.
Here we’re bridging the gap between slow accuracy work and faster drills. With the Controlled Pairs Drill, you’ll start tightening your groups toward that 2 to 4-inch zone—all aiming toward your 25-yard goal.
5-Round Burst Drill
Now we’re stepping it up. The 5-Round Burst Drill pushes your recoil management and shooting rhythm to the next level.
So, set your target—and from a solid stance and grip, fire five rounds in a controlled burst. You’re not dumping the mag, but you’re not pausing much either. Think smooth rhythm, front sight tracking, and keeping your hits on target.
Watch your sights. Stay locked in. Your grip should do the work—not your arms fighting recoil.
And if you're looking to smooth things out, here’s a solid tip for dominating muzzle rise: check out our top tier compensators. Your ultimate add-on for a flat and fast-shooting gun. These comps will cut recoil by up to 80%, so you can focus on tightening those groups at 10, 15, and 25 yards.
Pro Tip for Shooting at 25 Yards
Now’s the perfect time to add Tim Herron’s golden tip—the Shoot Through Drill. It’s a really smart way to get instant feedback on your precision as you work toward mastering 25-yard shooting.
Set up two paper targets—one at 7 yards with a 1 inch square, and another directly in line behind it at 25 yards. Run your drills focusing on tight groupings at 7 yards. Take your time. Aim for clean, centered hits.
Then walk back and check the 25-yard target. If your fundamentals are solid, your group should be centered on both targets.
Common Mistakes to Avoid
By now, you’re there—you know how to shoot a handgun at 25 yards. But hey—let’s also talk about what not to do.
These are the classic mistakes that mess with your accuracy, especially when pushing for tight groups at 25 yards:
-
Over-gripping the handgun: Death-gripping the gun creates tension and throws off your control. Let the grip do the work—not your whole hand shaking the frame.
-
Slapping or jerking the trigger: Press it straight back. No sideways pressure, no panic pulls. Trigger control is everything.
-
Misaligned sights: Rushing the shot before lining things up right? Yeah, that’s how groups drift. Slow down and see the front sight.
-
Flinching: Anticipating recoil makes you dip the muzzle. Stay steady—let the gun surprise you.
-
Forgetting to breathe: Holding your breath throws off rhythm and adds tension. Exhale naturally before the shot—breathe with intention, shoot with control.
-
Skipping the process: Don’t jump straight to 25 yards and expect magic. Build it up from 10 to 15, then 25. The best shooters didn’t skip the reps, and neither should you.
Conclusion
You’ve got the tools to shoot a handgun at 25 yards—and shoot it well.
Now it’s time to put it all into action. And there’s only one way to make it stick: consistent practice. Stick with the progression. Don’t rush it. Every rep counts.
Want more drills, tips, and training hacks? Keep exploring our expert shooting blog—we’ve got plenty more to help you level up. And if you’re hitting your goals (or grinding toward them), we’d love to see it. Tag us on the official 45 Blast Instagram and share your progress with the community.
Now get out there and try these tips on your next range visit. 25 yards is just the beginning—then comes 40 and beyond. Let’s see you there!