You just bought your first Canik pistol? Oh, you’re stepping into a whole new world. There’s plenty to learn: pistol shooting basics, how to hold a pistol, and how to make it feel really natural
Not clear on all that yet? Don’t worry, every shooter has been there.
Why did you buy your first gun? Self-defense, competition, tactical? Or maybe you just want to have some fun with friends at the range.
Whatever your reason, every shooter starts in the same place: the fundamentals. Safety, grip, stance, trigger control, and some solid pistol aiming tips. That’s how you turn your firearm into your ally, not your liability.
There’s also the insider info: range etiquette, gear setups, training drills, and even the unspoken rules of the gun community. We’ve packed all of that into this guide: the basics every Canik shooter (and really, every shooter) should know.
Welcome aboard, and let’s get you started.
Safety First: The Golden Rules
You just got into shooting, and here comes one big question: “how do I stay safe?” You also don’t want to look clueless at the range, by the way.
So here are the very basics of pistol shooting that every shooter lives by, whether it’s your first day or your thousandth. Just follow the NRA standard safety rules, every single time:
1. Treat every gun like it’s loaded
Even when you’ve cleared your Canik pistol, you need to handle it like there’s a round in the chamber. Thinking like this keeps you sharp and prevents the “I didn’t think it was loaded” mistake.
Chamber checks should become second nature, but the rule never changes: treat it like it’s hot.
2. Never point the muzzle at anything you don’t want destroyed
At the range, this rule means always keeping your pistol downrange. At home, it means keeping the barrel away from people, pets, or even your own body.
Wherever the muzzle points, you’re accountable. So always be aware of where it’s aiming.
3. Finger off the trigger until you’re ready to shoot
One of the best beginner shooting tips you’ll ever get: Keep your finger indexed along the frame until your sights are on target and you’re ready to fire. The habit of trigger discipline habit alone prevents nearly every accidental discharge. Keep it always in mind.
4. Know your target and what’s behind it
Identify your target before you shoot. Don’t just aim at movement, and don’t assume the backstop will catch everything.
As bullets can pass through targets, you always need to be aware of the bigger picture: what’s in front, behind, and around your intended shot.
The Right Stance: Balance + Control
We’re talking about handguns, so as the name suggests, your hands matter. But funny enough, pistol shooting basics actually start with your feet: your stance.
Your stance is the foundation of every shot. A sloppy stance lets recoil take control, throws off your aim, and ultimately lets bad habits settle in quickly. Even with the best Canik pistol in your hands, you still need a solid stance to stay balanced, steady, and ready for follow-up shots.
The two most common pistol stances every new shooter should try are the Isosceles and the Weaver.
Isosceles Stance
Think of this one as the “straight-on” stance:
-
Stand with your feet about shoulder-width apart, toes pointing toward the target.
-
Extend both arms straight out and lock them, forming a triangle with your shoulders.
Most beginners and range instructors start with the Isosceles stance because it’s simple, stable, and easy to repeat. The downside? You’re squared up to the target, which makes you less mobile and shows more of your body in defensive scenarios.
But don’t sweat that just yet. Mastering this stance gives you a rock-solid foundation, and later you’ll naturally move into more agile positions, as the ones you can find in our full shooting stances guide..
Weaver Stance
The Weaver stance is the angled approach:
-
Place your strong-side foot back, bend your knees, and blade your upper body slightly toward the target.
-
Your strong hand pushes forward while your support hand pulls back, creating that push-pull tension.
It may feel awkward at first, but once you settle in, the Weaver stance helps you absorb recoil and tighten your shot groups. It’s been a law-enforcement favorite for decades and is still preferred by many shooters who like to blend stability with control.
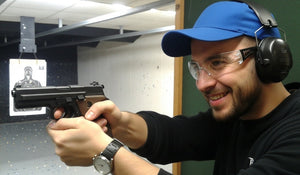
Grip It Right: Stability + Comfort

Next comes grip: the way you hold your pistol. Especially when you’re starting out, it’s all about using both hands, your strong hand and your support hand.
A solid master grip keeps your pistol stable, controls recoil, and sets you up for more accurate shots. In fact, learning how to hold a pistol properly comes before dialing in your trigger control. Grip is the foundation that makes everything else work.
What’s a good master grip? It means the pistol is well locked into your hands:
-
Strong hand: Get as high as possible on the backstrap, leaving no gaps. Wrap your fingers so they are firm around the grip, but keep your trigger finger straight along the frame until you’re ready to shoot.
-
Support hand: Slide your hand in to fill the empty space on the grip. Wrap your fingers over your strong hand, with your thumb pointing forward along the frame toward the target.
-
Pressure: As we said, both your hands work together. Your support hand locks in your pistol, about 60/40 pressure. Don’t strangle the pistol, just lock it in place so it stays steady through each shot.
Here’s the key: every time you draw from the holster, your hand should land in the exact same spot. Build that consistency, and you’ve laid the groundwork for accuracy, speed, and recoil management. That’s the real secret behind good master grip.
Trigger Control & Aiming Basics
Next up is the subtle art of trigger discipline and trigger control. Both sound simple, but they take time to hardwire into muscle memory.
Trigger discipline comes first: keep your finger straight and off the trigger until your sights are on target and you’re ready to fire. That goes for holstering, reloading, or moving between drills. If you’re not about to shoot, your trigger finger should automatically extend high along the frame, just above the trigger guard. Period.
From there, you build the habit of trigger control: the way your finger actually presses the trigger. When you’re ready to fire, use the pad of your finger, not the tip or the knuckle. The goal is a smooth press straight back, so your sights don’t dip, rise, or drift sideways.
We’ve covered trigger discipline and control in this guide, for more detail. While you practice, here are a few common mistakes to avoid:
-
Hooking your finger inside the trigger guard out of habit.
-
Using too much or too little finger, which pulls shots off target.
-
“Testing” the trigger with little squeezes when you’re not actually ready to fire.
The best beginner shooting tip here is simple: don’t rush. Start with slow, deliberate dry fire practice. Learn your trigger’s “wall” and reset point until it feels natural. And if you own a Canik pistol, you’ve got an edge already, as their factory triggers are some of the best in the world.
Once you’ve built solid grip and trigger control, you’ll progress faster into more advanced drills.
How to Improve Your Handgun Accuracy
Since we’re on the topic of accuracy, here’s a huge tip: add a compensator. A good comp cuts recoil and muzzle rise, helps you shoot faster, and keeps your shots in the A-zone.
Our 45 Blast compensators are American-made, built tough, and look awesome on all Canik pistols. They reduce recoil by around 60% to 80%, something both beginners and seasoned shooters love.
Installing a compensator is really simple, no gunsmithing required. It takes less than five minutes: Just unbox, attach to the barrel with the included screws, and you’re good to go.
So if you want to start off on the right foot, check out our full collection of 45 Blast compensators here.
Range Tips for Beginners
So, we’ve gone through the basics of pistol handling: safety rules, stance, grip, and trigger pull. To keep improving and build good habits, it’s time to put those skills into practice at the range.
How’s it going to feel heading to the range for the first time? Here’s your simple 101 checklist: bring your unloaded pistol, your ID, any permits if required, ammo, and your hearing and eye protection.
When you walk in, make sure your pistol is safe and stored. Don’t draw, load, or point it in any direction until you’re at your assigned lane.
Once you’re there, that’s when you unholster. Just remember to always keep the muzzle pointed downrange, and then load up.
Every place has its own set of rules, but here’s a quick rundown of range etiquette 101:
-
Keep all firearms holstered or in a case when entering or leaving.
-
Always keep your muzzle downrange. Don’t break the 180 rule.
-
Listen to the Range Master, and report anything unsafe.
-
Uncase and handle one firearm at a time.
-
Never handle firearms behind the safety line.
-
Always wear eye and ear protection, and respect the firing line.
Some shooting ranges may have additional rules, so always check when you arrive. But these basics are what keep every range safe, professional, and fun for everyone.
Next Steps? Get Better, Shoot Smarter
Well, how ready do you feel now? We rarely feel 100% ready for something new, but the only way to learn is to jump in and try. No excuses.
We’ve gone over the basics of pistol shooting: firearm safety, pistol stance, grip and trigger control, and aiming tips. We even covered what to expect your first time at the range. So now, it’s just about going for it.
And remember, here at 45 Blast you’ll find the best gear for your Canik. From top tier compensators to high-quality holsters, our online store has what you need to boost progress, safety, and accuracy.
So grab your Canik, hit the range, and start putting in the work. See you out there!